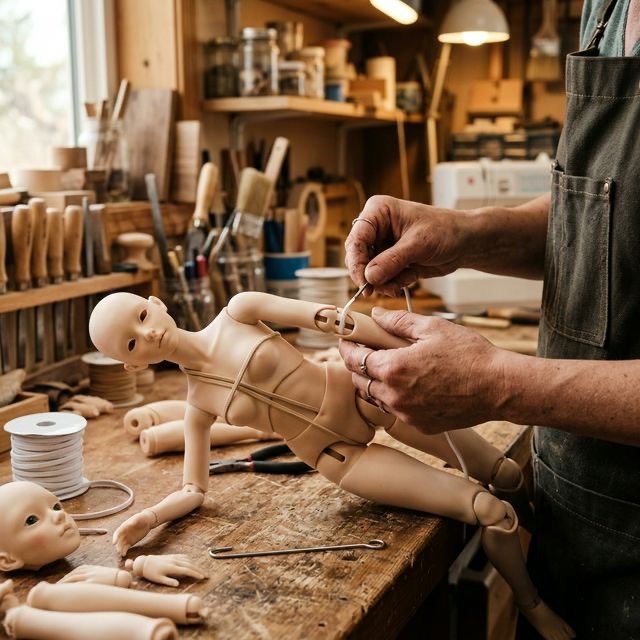
A Ball Jointed Doll relies entirely on an internal tension system made of heavy-duty elastic cord. Over time, this elastic naturally degrades, stretches, or loses elasticity, resulting in a doll that cannot hold a pose, "kicks," or goes completely floppy. Restringing is a fundamental skill every BJD owner must eventually master.
Tools You Will Need
Restringing can be intimidating, but the right tools make the process significantly smoother:
- Stringing Tools: A long wire hook (often provided by doll makers) and a pair of sturdy hemostats (locking forceps).
- New Elastic Cord: 3mm elastic for 1/6 (YOSD) and 1/4 (MSD) dolls; 4mm or 5mm elastic for 1/3 (SD) dolls.
- Ribbon or Thick Thread: To pull the elastic through tight channels.
- Soft Towel or Pillow: To rest the delicate resin pieces on and prevent chipping during the pulling process.
The Restringing Process
1. Disassembly and Documentation
Before unstringing your doll, it is highly recommended to take photos of the interior joints, particularly the S-hooks located in the hands, feet, and head. Unhook the head first using your hemostats to grip the elastic cord securely below the S-hook. Slowly unhook the rest of the limbs, placing the pieces in anatomical order on your towel to avoid confusion during reassembly.
2. Measuring and Knotting the New Elastic
A standard BJD requires two main loops of elastic: a long piece for the legs and torso, and a shorter piece for the arms.
To measure the arm elastic: Run the cord across the doll’s chest and down the arm length, doubling it, and tying a strong knot (a figure-eight knot is best). The tension should be shorter than the actual physical distance to create a tight pull.
For the legs and body: The elastic should travel from one foot hook, up the leg, through the torso, into the head hook, back down the other leg, and to the other foot hook.
3. Threading the Arms
Push the knotted arm loop through one shoulder socket to the other. Use your wire tool to pull one end of the loop through the arm pieces to the wrist, attach the hand S-hook, and carefully release. Repeat for the opposite arm.
4. Threading the Body and Legs
Take the long elastic loop and hook its center point onto the internal head hook (or neck mechanism). Drop the two ends of the loop down through the hollow torso into the pelvic joint. Feed one loop down through the thigh, knee, and calf of the right leg, clamp it with hemostats, and attach the right foot. Repeat the tension pull for the left leg.
Adjusting Tension
If your doll "kicks" (the limbs snap back to a straight position forcefully), the elastic is too tight. If the doll cannot stand or hold an arm up, it is too loose. You may need to unhook the head or hands and adjust the knot to refine the tension. Practice and patience are key to achieving the perfect balance of poseability and stability.